
If you've ever wondered how much paneer you can get from a gallon of milk, you're probably doing some kitchen calculations. Making paneer at home is a straightforward process, and knowing what to expect in terms of yield can save you a surprise or two in the kitchen. On average, a gallon of whole milk will give you about 1.5 to 2 pounds of paneer, depending on a few factors.
The freshness and quality of the milk you use play a huge role. Fresher milk generally means more curds and a creamier paneer. Also, whole milk is a winner here—it produces a richer cheese compared to its skim or semi-skimmed counterparts. If you're aiming for the best results, opt for high-quality, full-fat milk.
Temperature and timing matter too. Heating the milk slowly and consistently before adding an acid (like lemon juice or vinegar) ensures a good separation of curds and whey. This means not rushing the process. Trust me, patience is key.
- Introduction to Paneer Making
- Milk Selection and Its Impact on Yield
- Step-by-Step Process of Making Paneer
- Factors Affecting Paneer Yield
- Common Mistakes and Tips for Success
Introduction to Paneer Making
Paneer is a type of fresh cheese commonly used in South Asian cuisine. It's a firm, non-melting cheese that takes on flavors beautifully, making it a popular choice for curries and stir-fries. If you're keen on making paneer at home, you're in luck because the process is pretty simple.
At its core, making paneer involves separating the milk solids from the liquid, otherwise known as curds from whey. The trick to getting this right is the combination of heat and acid. For most homemade paneer enthusiasts, using lemon juice or vinegar as the acid is the way to go.
What You Need to Start
- 1 gallon of milk (preferably whole milk for richer cheese)
- Acidic agent like lemon juice or white vinegar
- Cheesecloth for straining
- Heavy pan and a stirring spoon
Once you've got your essentials ready, heat the milk in a pan on medium. Stir it occasionally to avoid sticking. Just as the milk comes to a boil, add your chosen acid and continue to stir gently.
The Magic Moment
As the acid combines with the warm milk, you'll notice the mixture starting to curdle almost immediately. This split into curds (solids) and whey (liquid) is the magic you’re looking for. Once the milk is fully curdled, take it off the heat.
Draining and Pressing
Line a colander with cheesecloth and pour the curdled milk through it. The liquid whey will drain out, leaving curds behind. Rinse these curds briefly with cold water to remove any lingering acid, which ensures your homemade paneer will have a clean, smooth taste.
Gather up the cheesecloth and form a tight bundle. Press it down with something heavy like a pot full of water to firm up your paneer. About 30 minutes of pressing usually does the trick.
And there you have it, a wonderfully simple cheese that's ready to be diced and cooked up into your favorite dishes. Fresh paneer can add that perfect, tender touch to your meals.
Milk Selection and Its Impact on Yield
When it comes to making paneer, not all milk is created equal. The type and quality of milk you choose can greatly influence how much cheese you get in the end.
Whole versus Low-Fat Milk
For the richest and creamiest paneer, whole milk is the best option. The higher fat content helps in forming more curds, giving you a denser cheese and maximizing your yield. Low-fat or skim milk, while usable, compromises on both texture and quantity, often resulting in a dryer and less substantial finish.
Processed Milk
A common question is whether to use pasteurized or raw milk. While raw milk can produce lovely results, it's not always practical or available. Most people use pasteurized milk, which works just fine for homemade paneer. However, avoid ultra-pasteurized milk if possible. The high heat it undergoes alters the proteins in a way that reduces curdling efficiency, leading to less cheese.
| Milk Type | Expected Paneer Yield (per gallon) |
|---|---|
| Whole Milk | 1.5 to 2 pounds |
| 2% Milk | 1.2 to 1.5 pounds |
| Skim Milk | 0.8 to 1 pound |
Organic and Local Options
If available, local and organic milk can be a game-changer. These options are often less processed, potentially retaining more of the natural proteins that contribute to better curd formation. Supporting local farmers while getting excellent cheese? That's a win-win.
In summary, choosing whole, ideally fresh, non-ultra-pasteurized milk is crucial if you're aiming for the best quality and quantity of paneer. Pay attention to these factors, and your cheese-making adventures will surely be fruitful!
Step-by-Step Process of Making Paneer
Making paneer at home is like crafting your own masterpiece in the kitchen. Let's break it down step by step, so you can create delicious, homemade paneer with ease.
Step 1: Gathering Ingredients
First things first, you'll need a gallon of whole milk, an acid like lemon juice or vinegar, and a bit of salt if desired. While it might sound too simple to be true, that's really all you need!
Step 2: Heating the Milk
Pour the milk into a large pot and slowly bring it to a gentle boil over medium heat. Stir occasionally to make sure it doesn't stick to the pot or scorch. Aim for patience here—rushing this could mess with the texture of your paneer.
Step 3: Adding the Acid
Once your milk starts bubbling, it's time to add the acid. Use about 1/4 cup of lemon juice or vinegar. Slowly pour it in while stirring—this is key to getting nice, fluffy curds.
Step 4: Separating Curds from Whey
"Distinguishing curds and whey is essential to cheese-making," says renowned cheesemaker Elisabeth Papillo. "Getting this right determines the quality of your yield."
Once you see the milk start to separate into curds and whey, which should happen almost immediately after adding the acid, turn off the heat. Let it rest for about 10 minutes.
Step 5: Draining the Curds
Line a colander with a cheesecloth and slowly pour the curds and whey through it, allowing the whey to drain away. Rinse the curds with a bit of cold water to remove any acidic taste.
Step 6: Pressing the Paneer
Gather the cheesecloth into a ball and squeeze out the remaining whey. For firmer paneer, press it under a weight—something like a heavy pan or pot—for about 1-2 hours. This step firms up your paneer into that familiar block shape.
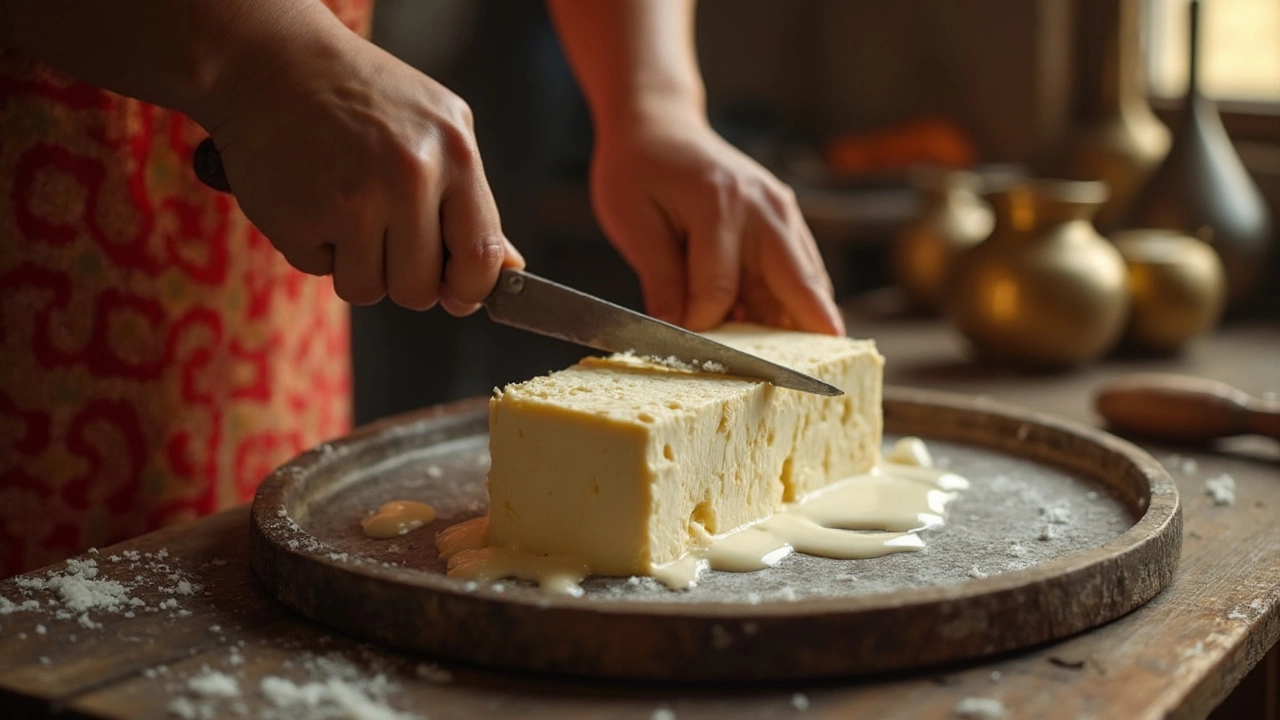
Step 7: Cutting and Storing
Once pressed, unwrap the paneer and cut it into cubes. You can refrigerate it in an airtight container for up to a week.
| Time | Action |
|---|---|
| 5-10 minutes | Boil milk |
| 1 minute | Add acid, stir |
| 10 minutes | Let curds form |
| 1-2 hours | Press under weight |
There you have it! With these steps, you can enjoy fresh, homemade paneer ready to enhance your favorite dishes.
Factors Affecting Paneer Yield
So you're ready to turn milk into magic, but let's talk about what can change how much paneer you actually end up with. It's all about the little details, and understanding these can help you get more cheese for your efforts.
Type of Milk
The type of milk you're using plays a big role. Whole milk is your best bet since the higher fat content helps in forming a richer, more plentiful paneer. Skim or semi-skimmed milk just can't deliver the same crowd-pleasing results.
Milk Freshness
Fresher milk makes happier curds. Old or sour milk might not produce as much paneer because the acidity level interferes with the curdling process. Buying milk that’s as close to farm-fresh as possible is a game-changer.
Coagulating Agents
What you're using to curdle the milk is another factor. Whether it's lemon juice, vinegar, or citric acid, adding the right amount and at the right time is crucial. Too little, and the curds may not form properly; too much, and the paneer can become overly crumbly.
Heating Process
Temperature and timing can make or break your cheesemaking. If the milk isn’t heated enough, the curds won't form fully; but if overheated, they might end up tough and chewy. Aim for a gentle simmer, not a bubbling boil.
Patience in Draining
Once your curds are formed, draining them properly affects both the texture and the yield. Too much pressure or rushing through this part can squeeze out the creamy goodness. It's worth waiting an extra few minutes to retain more of the moisture for a soft paneer.
Acid to Milk Ratio
If you're curious about the nitty-gritty, here's a neat little table to guide you:
| Factor | Impact on Yield |
|---|---|
| Whole Milk | High |
| Skim Milk | Low |
| Freshness | High |
| Old/Sour Milk | Low |
| Lemon Juice | Moderate |
| Vinegar | High |
Understanding these factors brings you one step closer to mastering the art of homemade paneer. So the next time you're planning to make some, you know what to look out for to get the best yield!

Common Mistakes and Tips for Success
Making homemade paneer is pretty straightforward, but there are some common trip-ups that people often encounter. Here’s a breakdown of what to watch out for and some handy tips to steer clear of these pitfalls.
Don’t Overheat the Milk
One major mistake is letting the milk get too hot. High heat can lead to a hard and rubbery paneer. Instead, aim for a gentle simmer, just when bubbles start forming around the edges. Use a kitchen thermometer if you can; keeping it around 85°C to 90°C (185°F to 194°F) is ideal.
Choosing the Right Acid
Adding your acid too quickly or in excess can result in a crumbly paneer. Some folks swear by lemon juice, but vinegar or even yogurt can work wonders. Introduce the acid slowly, right when the milk reaches the simmering point.
Patience with Draining
A crucial step is properly draining the whey. Rushing this can leave your paneer soggy. Let it sit in the cheesecloth for at least 30 minutes. Some people even place a weight on top for firmer texture. Remember, time is your friend here.
Check List
- Use full-fat and fresh milk for the best yield.
- Monitor heat closely – avoid boiling!
- Introduce acid gradually and gently stir.
- Consider adding a pinch of salt for flavor.
- Let it set under weight for a denser texture.
A Quick Look at Milk Yields
| Milk Type | Approximate Yield |
|---|---|
| Whole Milk | 1.5 to 2 pounds of paneer |
| Low-Fat Milk | 1 to 1.5 pounds of paneer |
These tips ensure your homemade paneer turns out creamy and delicious without any unwanted surprises. Experiment a little and find what works best for you!