
Roti, a staple in many kitchens, can be a bit tricky when you're chasing that perfect round shape. But fear not, mastering it isn't as elusive as it might seem. Start with getting your dough right. A soft, pliable dough is the cornerstone of pulling off a beautiful round roti. Remember, crumbly or dry dough is a recipe for frustration, not flatbreads.
Using the right tools can make a world of difference too. A trusty rolling pin and a flat surface are your best friends here. Don't go hunting for fancy gear; the basics will do just fine. And here's the trick: consistency and light-handed pressure work wonders.
- Understanding the Dough
- Tools You Need
- Rolling Techniques
- Tips for Even Cooking
- Common Mistakes to Avoid
- Practice Makes Perfect
Understanding the Dough
When it comes to making that perfectly round roti, it all begins with the dough. The texture, consistency, and even the flour type play a huge role in shaping your end result. Here's the scoop: using whole wheat flour usually gives the best results because it keeps the dough stretchy yet firm.
Timing also matters. Knead until the dough feels soft and elastic; this typically takes about 5-7 minutes of good hand work. You don't want it too sticky but also not so firm that it's tough to roll out. A good rule is the dough should spring back a little when poked, like a friendly little dough ball.
After kneading, let your dough rest. This is non-negotiable! Resting for 15-30 minutes covered with a damp cloth allows the gluten to relax, making rolling a breeze. Resting time also enhances the taste and texture of the roti, giving it a nice soft bite.
- Tip: If your dough feels too sticky, sprinkle a bit of flour while kneading. If it's too dry, add a touch of water.
- Tool Tip: Use a large mixing bowl for the dough to avoid mess and give you more room to work your magic.
By the way, if you're into numbers, a good dough-to-water ratio is roughly 2:1. So, for every two cups of flour, use about one cup of water. But remember, humidity and room temperature can affect this, so tweak as needed.
Understanding your dough is like learning to drive—it’s all about getting comfortable with the feel. Once you master it, rolling that round, perfect roti is just a step away.
Tools You Need
Making a perfectly round roti requires just a few basic tools. The good news is that you probably already have most of them in your kitchen!
First off, you'll need a rolling pin. A trusty, traditional wooden rolling pin is usually best for home use. It gives you the right balance and control. If you've got a silicone one, that's fine too, but some folks find it a bit slippery.
Next in line is a flat, clean surface for rolling. A marble or granite countertop works wonders because they help keep your dough cool and prevent sticking. If you don't have a marble board, a clean wooden surface or a large cutting board will do. Make sure it's spacious enough for you to comfortably move the rolling pin around.
You'll also need a flat tawa (griddle) for cooking. Ideally, a cast-iron tawa is preferred because it distributes heat evenly, but a non-stick one also works pretty well. Just ensure it's got a wide enough surface to flip your roti easily.
If you're a bit particular about thickness, a rolling guide ring can be handy. It fits over your rolling pin and ensures uniform thickness, which is great if you’re just starting.
Here's a quick look at the basic tools you need:
- Wooden or silicone rolling pin
- Marble or wooden flat surface
- Cast iron or non-stick tawa
- Optional: rolling guide ring
With these tools at hand, you're set to conquer the art of making a perfectly round roti.
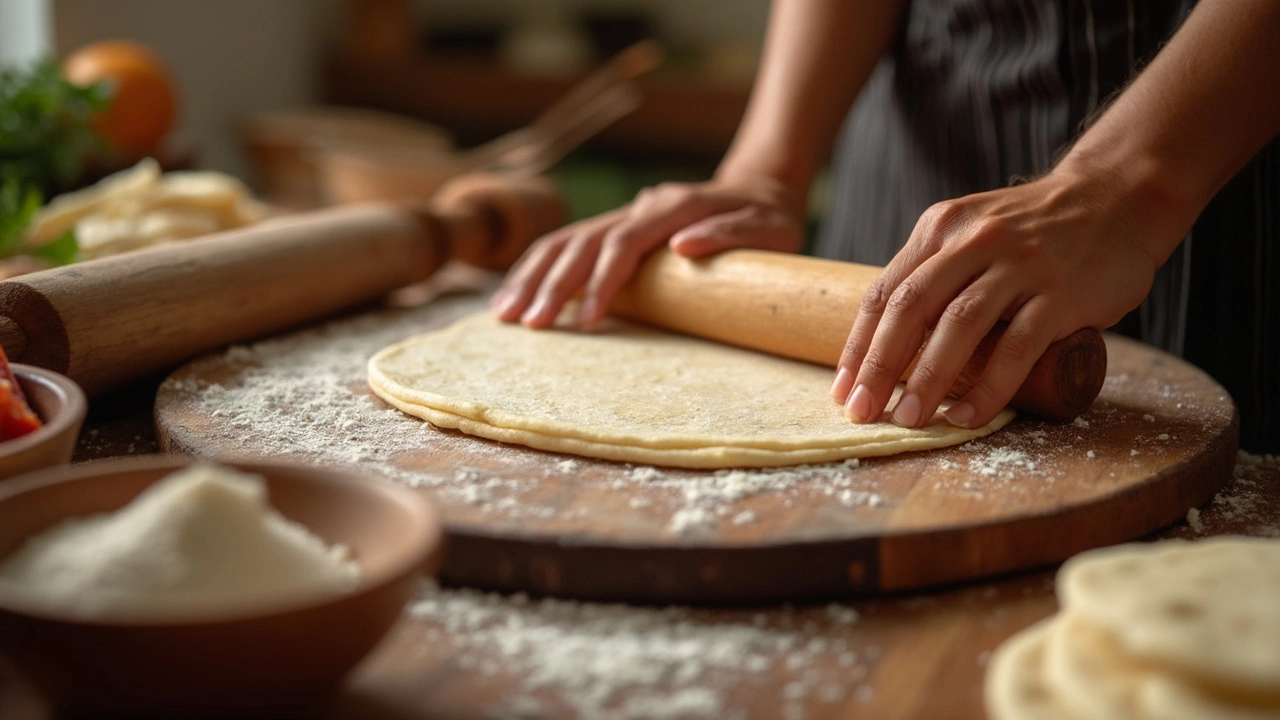
Rolling Techniques
Getting the right roll can turn your roti from irregular shapes to perfectly round wonders. It’s all in the technique, and once you grasp it, making round roti will feel like second nature.
Start by flouring your surface lightly to prevent sticking. Pinch off a portion of the dough, roughly the size of a golf ball, and flatten it a bit with your palms. This step helps you keep an even thickness, which is key when you're aiming for that perfect circle.
Use your rolling pin to gently roll the dough from the center outward. That’s right, don’t flatten the edges just yet. Rotate the dough frequently, making sure you apply consistent pressure. This ensures your roti isn't thick in one spot and paper-thin in another.
- Apply light pressure: Don't press too hard. Picture the dough as a delicate canvas that needs gentle handling.
- Maintain a circular motion: Move the dough around a bit after each roll to keep it even. Think of it like adjusting a wheel as you steer – little, necessary adjustments keep you on the right track.
If you're someone who loves a visual, it might help to imagine drawing a series of connected lines that form a circle. Each roll should feel like adding another piece to complete that circle.
For those keen on details, here's a curious nugget: some experts say the ideal thickness for a perfect roti is about 2mm. But no worries if you don't have a ruler handy; trust your eyes and practice!
Once you’re confident with the roti making tips, you might just find these little tricks will soon make perfect rotis your family's new favorite thing!
Tips for Even Cooking
Alright, you've got your round roti rolled out and ready to hit the pan. But wait! There's a bit more to it if you want that perfectly cooked, delicious roti. The key is heat control. Too hot, and you'll have burnt spots; too cold, and your roti will dry out rather than puff up.
Start by getting your tawa or griddle nicely preheated. Medium-high heat is the sweet spot. You can test the heat by sprinkling a few drops of water on it—they should sizzle and evaporate quickly. That's your cue to pop that roti on.
- Place the roti on the tawa. Wait just a few seconds for it to slightly change color.
- Flip it over. Let it cook a bit longer on this side; small bubbles should start forming.
- Flip it back to the first side. Gently press the edges with a clean cloth, encouraging it to puff up.
- Once it's puffed and golden, it's ready to serve!
Another pro tip: Rotis love being treated gently. Don't press them down too hard with your spatula, or you'll end up with tough spots. Also, if your roti isn't puffing up, it might be too thick. Try rolling it out a bit thinner next time.
And don’t forget, storing them properly helps keep them fresh and soft. Wrap them in a towel or stash them in an airtight container soon after cooking. This traps moisture and keeps them from drying out.
Common Mistakes to Avoid
Getting perfectly round roti can feel elusive, especially if you're just beginning. But understanding common pitfalls might just save your next batch from the depths of despair. It’s about spotting those pesky habits early and setting them straight.
One biggie? Dough consistency. Too dry and it’ll turn your roti into a rigid and cracked mess. Too wet, and it’ll stick to everything like gum on a shoe. Aim for a smooth, soft ball that gently sinks when pressed.
Then there's the rolling. Many folks press down too hard on the rolling pin. It's all about gentle, even pressure. Let the weight of the pin do the job. And, don’t forget: Rotate your dough while rolling. A static dough ball often leads to wonky shapes.
As chef Anjali Pathak once said, "A perfect roti is an art form in itself, requiring balance in every step, from mixing to rolling."
Another trap? Cooking temperature. Keep your pan hot—think sizzling but not smoky. If the pan's too cool, you'll end up with pale, sad rotis. But too hot, and you're looking at burnt edges with raw insides. Aim for that sweet spot where the surface is hot enough to quickly puff up your roti but not incinerate it.
Over-flouring the surface is a sneaky mistake. While it's tempting to prevent sticking, too much flour can make your roti dry and hard. Just a dusting is enough.
Let's face it, practice makes perfect. So keep these in mind, and pretty soon, you’ll be rolling out perfectly round roti like a pro.
Practice Makes Perfect
Alright, so, you've got your dough sorted, the tools are in place, and you're just about ready to roll—literally. Here's the thing about making perfectly round roti: it takes time and patience. Every attempt is a step closer to getting it just right.
One key to mastering roti is consistency. Make it a habit to practice rolling out a few rotis every day. It's not just about repetition; it's about learning from each attempt. Notice how subtle changes in your technique affect the shape and texture. Keep an eye on the pressure you apply with your rolling pin; too much pressure can lead to wonky shapes, and no one wants that!
Here's a fun fact—many accomplished home cooks recommend keeping a few practice rounds purely for the sake of improving your skills, almost like a warm-up. So, don't sweat it if your first few don't look like they belong in a cooking show. Perseverance is your best friend here.
And if you're the type who likes a challenge, try timing yourself. See how long it takes to roll a perfect roti. A little ambition never hurt anyone! With time, you'll start to notice marked improvements in both shape and speed.
What if you find yourself slacking off? Pair your practice sessions with cooking something new or setting a routine with a pal. You can even share your successes (or failures) on social media. Nothing like a little audience to keep you motivated.
Remember, every master was once a beginner. So roll up those sleeves, grab your rolling pin, and embrace the journey to making those elusive perfectly round rotis a reality!